AWS Subnets, Security Groups and Access Control Lists. So what is the difference?
Some time ago, a new client had asked me how we will protect his servers if he will decide to migrate them to AWS? I gave him a list of topics that AWS provides from the standpoint of security.
“So how do you block access to the servers from the Internet?” he asked.
“Well, we use Virtual Private Cloud (VPC), subnetting and Security Groups (SG)” I answered, and explained the basics.
“Ah, these are like Access Control Lists (ACL)” he said.
“Well, AWS has ACL also, but we usually configure network access with SG, ” I told him.
“So, what is the difference, what is more secured?” He asked.In this post, I will try to present the difference between SG and ACL on an AWS VPC using some basic networking principles and examples.
Subnetting your VPC
To understand the main difference between SG and ACL one must first understand the concept of a subnet, and how a VPC is divided into subnets. A subnet is a logical division of the IP address range into smaller logical networks. When you are creating a new VPC, you will be asked to specify a CIDR block. To create a new VPC, just go to the VPC Dashboard on the AWS console, select Your VPCs (1) and press on Create VPC (2):

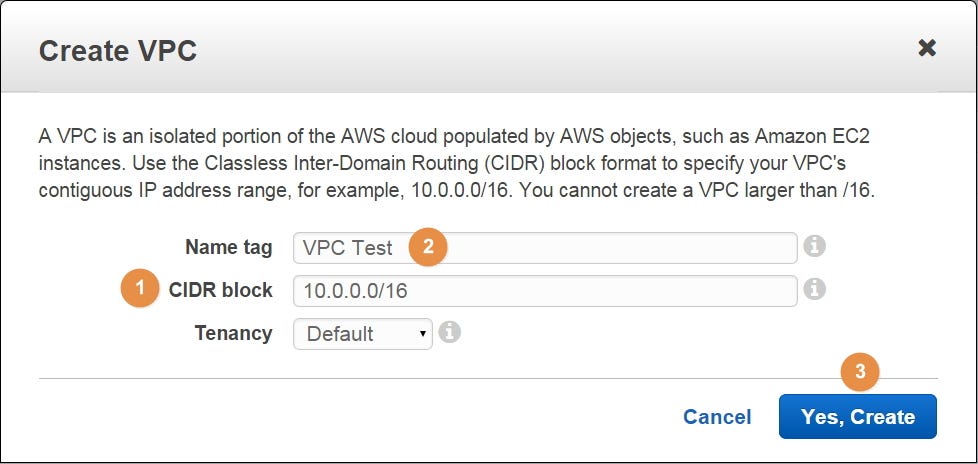
In the popup window, I have selected a CIDR block of 10.0.0.0/16 (1) for a VPC named VPC Test (2), which we will use during this post. Press on Yes, Create (3) to create the VPC:
To create a new subnet select Subnets (1) and press on Create Subnet (2):

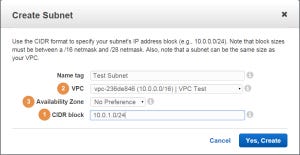
When creating a new subnet, the CIDR block can be further divided into smaller chunks. In the following example, I have created a subnet named Test Subnet with a CIDR block of 10.0.1.0/24 (1) which supports 256 IP addresses and resides in the Test VPC (2). You can also select a preferred
Availability Zone (3):
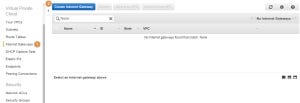
Each subnet inside a VPC is connected to a router which routes the traffic between the different subnets in the VPC – this is how you get connectivity between different subnets inside the VPC. For EC2 instances on the same subnet, no routing is needed. By now, you are probably asking yourself – but how do I connect to the Internet? This is done by connecting the router to an Internet Gateway. To create an Internet Gateway select Internet Gateways (1) from your VPC Dashboard and press on Create Internet Gateway (2):
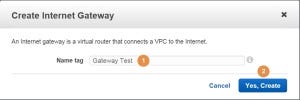
In the popup window give a Name tag (1) to the internet gateway and press on Yes, Create (2):
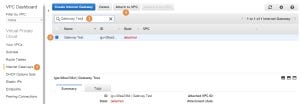
The last thing to do will be to attach the new Internet Gateway to our new VPC. On the VPC Dashboard select Internet Gateways (1) and search for the Internet Gateway you would like to attach (2). Select the Internet Gateway (3) and press on Attach to VPC (4):
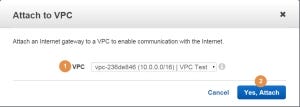
In the popup window select the VPC (1) and press Yes, Attach (2):
Whenever you create a new VPC, AWS will automatically connect a router to the VPC and create a default route table. Each subnet that you add to that VPC will be linked to this route table by default. Let’s take a look at the routes of the Route Table (1) of our subnet:
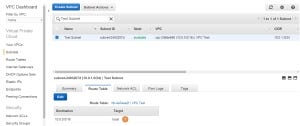
The route table has only one route, which sends all traffic with destination 10.0.0.0/16 to the local target. This rule will enable the different subnets of the VPC to communicate with each other. Our subnet and any other subnets added to the VPC with the current default route table will have no access to or from the Internet. This kind of subnets is called Private Subnets.
We will need to modify the route table in order to grant our subnet access to the Internet. On the VPC Dashboard select Route Tables (1), find the Route Table (2) and select it (3). Select the Routes tab (4) and press on Edit (5):
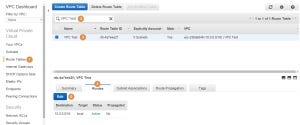
Press on the Add another route Button (1) which had appeared. Add 0.0.0.0/0 (which means any destination) to the Destination and select the Internet Gateway that we have created (2). To finish, press on Save (3):
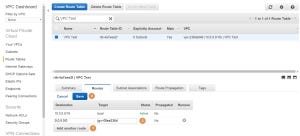
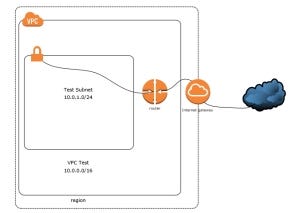
With the Internet Gateway attached our subnet can now access the Internet. This kind of subnets is called Public Subnets. The following diagram illustrates the network setup that we have created:
Routes, subnets, and CIDR blocks can be a bit tricky. If you want to know more, just search it, as there are a lot of websites devoted to the subjects. For you book lovers, I can suggest this book, where you can find a good explanation of the subjects.
Secure Those Instances!
Some of the parameters we are asked to specify when launching a new EC2 instance is the VPC, the subnet and the Security Groups (SG) for the instance. We have already created a VPC and a subnet, so now it’s time to create an SG. On the EC2 Dashboard select Security Groups (1) and press on Create Security Group (2):

In the popup window give the SG a name (1), a description (2) and select the VPC (3). Below you will notice two tabs for the SG rules (4), Inbound and Outbound. On the Inbound tab, you will notice that there are no inbound rules. Press on the Add Role for the Inbound tab (5):
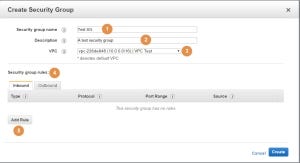
Inbound traffic means traffic coming into the instance. The origin of the traffic can be an instance on the same subnet, on a different subnet on the same VPC, or a server on the other side of the world.
By default, a new SG is created with no inbound traffic allowed. When setting a new rule, we must specify the Type (1), Protocol (2), Port Range (3) and Source (4). In the following example I have permitted inbound access for the SSH protocol only from My IP address (the public IP address I currently use to connect to the AWS console, not shown), and to the HTTP and HTTPS protocols from Anywhere (that is what the 0.0.0.0/0 means):
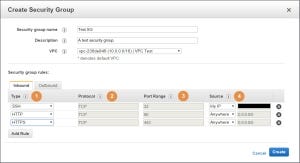
Outbound traffic means traffic going out from the instance to a specific destination. Let’s take a look at the Outbound tab. By default, a new SG will permit any traffic going outbound from the instance (1). If you are in a need to prevent outbound traffic, except for specific ports or protocols, delete the “any” rule and add your own rules. In order to finish and create the SG just press on Create (2):
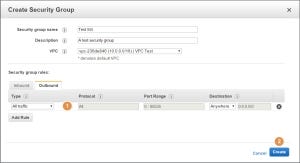
The most important point to note here is that SG is instance specific. You associate an SG to an instance or to a group of instances, but not to a subnet or a VPC altogether.
If you ever worked with ACL on a firewall before, then you may be asking yourself a few questions – What is the order at which the SG inbound and outbound rules are evaluated, does the SG uses stateful or stateless filtering and where are my deny rules?
In an ACL (and, as we shell see, with AWS ACL also) each rule is numbered. When a packet arrives at the firewall, it gets evaluated against the rules of the ACL starting with the rule with the lowest number. When a match is found, the rule is enforced and the packet is permitted or dropped. The rules with higher numbering than the matched rule are not evaluated. If the packet doesn’t match a rule, the next rule with a higher number is evaluated and so forth.
Security Groups operate in a different way. As we saw, there are no numbers to the SG rules. The rules are evaluated as a whole, no rule has precedence over other rules.
When an EC2 instance initiates a connection to some server, its outbound traffic will be evaluated against the outbound SG rules. If the rules permit it, the traffic will flow to the destination. But what happens when the remote server response? The inbound traffic should be evaluated against the inbound SG rules, but the remote server IP address and port are not always known beforehand. If we don’t know the remote server IP address and port, how can we create the proper inbound rules? The answer is that we don’t need to.
Security Groups implement stateful filtering. With stateful filtering, the inbound traffic originating from the remote server, as a result of the new connection initiated by our EC2 instance, will be automatically permitted even though there are no specific inbound rules. In the same manner, for a connection initiated from a remote server, if the inbound traffic is permitted to pass to our EC2 instance, the outbound traffic from our EC2 instance will be automatically permitted even though there are no specific outbound rules. As we shall see, ACL are using stateless filtering.
And no, there are no deny rules when using SG, only permit ones. All traffic flowing inbound or outbound should much to the evaluated SG rules or it will be dropped. With most cases, it is enough, though it can be painful at times. For example, imagine you want to permit all traffic from a specific location except from a specific protocol. In contrast, ACL have allowed and deny rules.
Any EC2 instance that is launched must have at least one SG associated to it. For each VPC you create, a default SG will be created for you. Let’s take a look at the default SG created for our VPC:
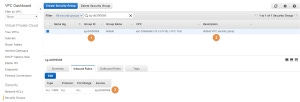
The Group ID of the SG is sg-dd3900b8 (1) and the Description states “default VPC security group” (2). Take a look at the Inbound Rules (3). The only rule that is specified permits all traffic from sg-dd3900b8. But wait, this is the ID of this SG. This is an example of a very handy feature. This specific rule will permit any traffic between any two EC2 instances which are associated with this SG. Therefore, the VPC’s default SG permits any traffic between any instances launched into the VPC that were associated to the default SG.
Secure Those Subnets!
Let’s take a look at the Network ACL (1) of our Test subnet:
This ACL has Inbound (2) and Outbound rules (3). Both the inbound and outbound rules are the same, they both permit any traffic from any source (rule number 100) and have an implicit “deny all” at the end (the rule marked with an asterisk, will get back to it later). I don’t remember creating this ACL when creating the subnet, so where did it come from?
When you create a new Subnet, a default ACL will be associated with the subnet. The ACL that we saw in the previous image is an example of a default ACL that was associated with our Test subnet.
Default ACL have no restriction on the inbound and outbound traffic so you can keep using SG without even knowing of ACL existence. On the other hand, a default SG will permit inbound traffic only from within the VPC and drop any other traffic. Both default SG and ACL permit any traffic in the outbound direction.
This brings us to an important difference between ACL and SG, the scope of there influence. As we saw, an SG is associated to an EC2 instance and defines the allowed inbound and outbound traffic for that instance. An ACL, on the other hand, is associated with a subnet. A subnet can host one or more EC2 instances, and all of them will be affected by the inbound and outbound rules defined in the ACL of that subnet. For example, if we should create an ACL inbound rule that blocks SSH traffic from a specific IP address. All the EC2 instances on the subnet associated with that ACL will be blocked for SSH access from that specific IP address.
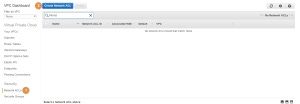
To create a new ACL, go to the VPC Dashboard, press on Network ACLs (1) and then on Create Network ACL (2):
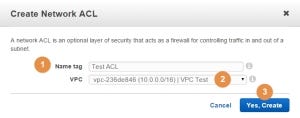
In the popup window, set a Name tag (1) for the ACL, select the relevant VPC (2) and press on Yes, Create (3):
If we will look at the Inbound Rules (1) of the new ACL, we will see that all inbound traffic is blocked (2):
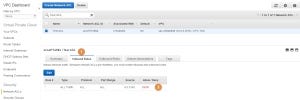
The same goes with the Outbound Rules (1) where all the outbound traffic is blocked as well (2):

As with a new SG, a new ACL will also block inbound traffic by default. However, while a new SG permits any outbound traffic, a new ACL blocks it by default.
Now, let’s add an inbound ACL rule which will permit SSH access from the 1.2.3.4 IP address. On the VPC Dashboard select Network ACLs (1) find the relevant ACL (2), select the Inbound Rules tab (3) and press on Edit (4):
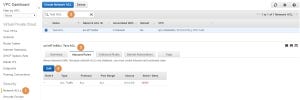
I have set the rule number to 100 (1), the protocol to SSH (2), which automatically have set the protocol to TCP and the port range to 22 (3). I have set the IP address to 1.2.3.4/32 (4, the “/32” notation means that it is a host IP address) and allowed the access (5). To finish press on Save (6):

The updated ACL now has two rules. The first rule numbered 100 is the rule we just created (1). The second rule, marked with an asterisk, is the implicit “deny all” rule (2):

The implicit “deny all” rule will always be evaluated last. As was stated before, any packet arriving inbound or outbound will be evaluated against the relevant ACL rules. In the end, if the packet does not match any of the rules, it will hit the implicit “deny all” rule and will be dropped. This ensures that only packets with a perfect match to an ACL rule (like a specific source IP address) will be permitted to pass.
Presume that we have launched a new EC2 instance to a subnet associated with our new ACL, gave it a public IP address, and configure an SG which would allow access to the instance on the SSH protocol from the 1.2.3.4 IP address. Now, will a client with an IP address of 1.2.3.4 would be able to connect to the SSH port? The answer is no. To understand why we need to look at the Outbound rules (1) of our Test ACL. The only rule there is the implicit “deny all” rule (2):
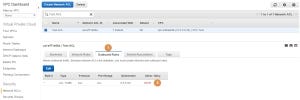
The SSH connection will not work because ACL use stateless filtering. The inbound traffic from the remote server, accessing the EC2 instance on port 22/TCP, will get through because both the subnet ACL and the instance SG will permit it to pass. However, when the instance will try to respond, the SG will let the traffic pass, because it uses stateful filtering, but the ACL will drop the traffic because it uses stateless filtering and has no outbound rules for the remote server. To mitigate this problem we can add an outbound rule. I have added a custom outbound TCP rule number 100 (1) which allows a range of TCP ports (2) to the 1.2.3.4 IP address:

So, why allow outbound traffic to a range of TCP ports and not to a specific port like we did with the inbound rule? To answer this question we need to understand the concept of ephemeral and well-known ports.
When a client initiates a connection to a server he needs to know the destination server IP address and port number (let’s use HTTP port 80 as an example). With these two parameters, the client will create a pair of TCP sockets. One TCP socket will be Server-IP-Address: TCP-Port, or in our example, Server-IP-Address:80. The second TCP socket will be the Client-IP-Address: Ephemeral-Port. The client shares these two sockets with the server (via the IP and TCP headers).
The Server’s TCP port (80 in our example) is the well-known port for the HTTP protocol. The well-known ports range from 0 to 1023 and are associated with well-known protocols (22 for SSH, 443 for HTTPS). When the client knows that it need to access the HTTP protocol on the remote server he will use port 80/TCP by default. For that reason, we can always open specific port numbers inbound to a server when we know exactly which services are running on that server (this is what we did with port 22/TCP when we configured the inbound rules for the Test ACL).
But why does the client needs a port number? The traffic from the server reaches the client because the client had given the server its IP address. The packets arriving at the client must be directed to the correct application that initiated the connection. This is done by associated the port number to that application (just like associating port 22 to the SSH service on the server). Moreover, this enables both the client and the server to have multiple connections with the same well-known port.
When the client initiates the connection, he chooses a random port number from a range of ports named ephemeral ports and creates the socket. They are called ephemeral or dynamic ports because whenever the connection is terminated they are released, and can be reused for other connections afterwords. Linux kernels usually use the port range 32768-61000. This exact port range was used for the outbound rule configured for our Test ACL.
In situations where we do not know the client IP address beforehand (like for a web server on the Internet), we will need to create an ACL outbound rule that will permit the ephemeral port range to any IP address (1):

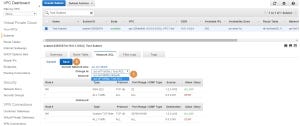
One last thing left to do is to associate our Test ACL with the Test Subnet. Open the VPC Dashboard, select Subnets (1) and search for the subnet (2). Select the subnet and press on Edit (3):
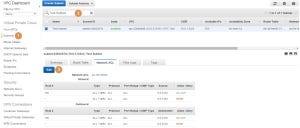
In the Change to a drop-down box (1) select the Test ACL and press on Save (2):
What is more secured?
Basically, ACL and SG do the same thing, they filter traffic. ACL adds a level of security by ensuring that each EC2 instance launched into the associated subnet is enforced by the rules specified in the ACL, even if the right SG where not configured. On the other hand, because of their stateless nature, there are more difficult to configure at times.
I usually use SG for the less secure, mostly internet facing instances. ACL are used for a very secure instance, like databases, where I want another layer of security and the clients accessing these instances are well known.

